一、準備:
①ソフトウェアのインストール:公式サイトからHD Playerをダウンロードしてください。
②コントロールカードの接続:
(1)有線:コンピュータのネットワークポートをコントロールカードに直接接続するか、同じローカルエリアネットワーク経由で接続します。
(2)ワイヤレス:コントロールカードでWiFiを有効にしてから、コンピューターまたは携帯電話をこのWiFiネットワークに接続します(デフォルトのパスワード:88888888)。
(3)USBフラッシュドライブ:インターネット接続不要、オフライン環境に最適。
③パラメータを確認してください:画面の幅と高さのピクセル数、モジュールタイプ、スキャンモード、コントロールカードモデル。
2. HDプレーヤーの基本的な操作手順:
①表示の作成または選択:
(1)HDPlayerを開いて左側のディスプレイを右クリックし、「新しいディスプレイ」をクリックします。
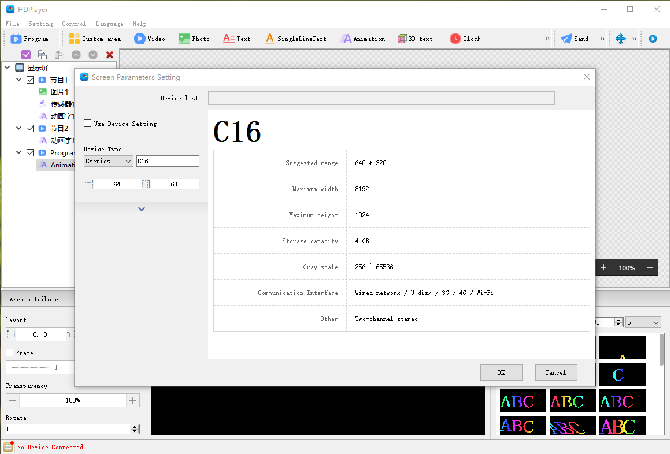
(2)画面の幅と高さ(例:P3 Full Color: 192×96mm)を入力して、コントロールカードモデル(例:HD-C16L)を選択して確定します。
(3)ソフトウェアはオンラインデバイスを自動的に検索し、バインドするデバイスを選択します。マルチカード構成の場合は、コントロール > デバイス関連付けで手動でバインドする必要があります。
②初回セットアップに必要な画面設定とハードウェア設定。
(1)設定画面パラメータに移動して、幅と高さ、フルカラーの色、カードに送信するグレーレベルを確認します。
(2)設定からハードウェア設定へ(パスワード:888)。
(3)受信カードパラメータを選択して、モジュールスキャンモード(1/16スキャン、1/8スキャンなど)を設定します。
(4)異常が発生した場合:赤い背景に黒い文字が表示されたらデータ極性を変更、点滅するドットが表示されたらOE極性を変更、不明なスキャンが表示されたらスマート設定を使用してください。
(5)設定ファイルを保存して、次回は直接読み込む。
三.プログラムコンテンツコアの編集:
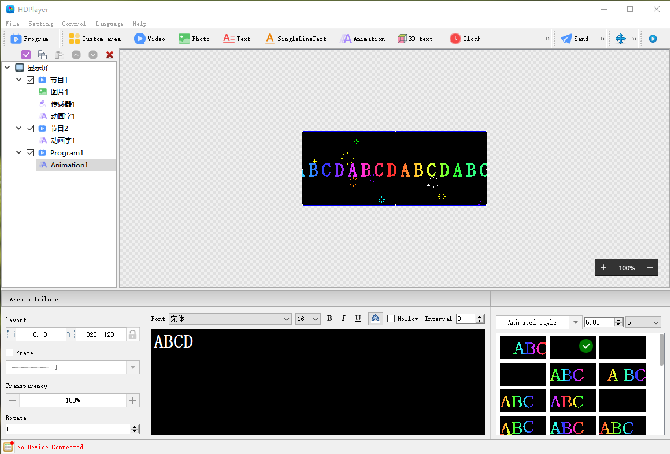
(1)表示画面を選択して「プログラム」をクリックし、新しいプログラムを作成します。複数のプログラムを作成でき、それらは順番に再生されます。
(2)ゾーンテキスト、画像、ビデオ、時計、アニメーションテキストをプログラムに追加し、ドラッグしてサイズと位置を調整します。
(3)プログラムプロパティ:再生時間、ループ回数、およびスケジュール再生(例:毎日9:00から21:00まで)を設定します。
4.コントロールカードへのプログラムの送信とエクスポートは非同期で有効になります。
(1)有線および無線伝送:
ディスプレイとプログラムを選択し、「送信」をクリックして送信先デバイスを選択し、アップロードが完了するまで待ちます。
送信が成功すると、画面にはすぐに新しいコンテンツが表示され、データは電源の再投入後も非同期ストレージに保持されます。
(2)USBドライブへのエクスポートはオフラインでの使用を推奨します。
制御するプログラムを選択>USBドライブにエクスポートして更新モードを選択:既存のプログラムを上書きするか、直接再生:USBドライブを挿入するとすぐに再生します。
USBドライブをコントロールカードのUSBポートに挿入し、読み込みが完了するまで待ちます。ドライブを取り外すと、画面に新しいプログラムが自動的に再生されます。
5.デバッグと管理:
①リアルタイムプレビュー:編集中にソフトウェアのプレビュー領域を監視して結果を確認します。
②明るさとコントラスト:設定で明るさ調整を行うか、日中は明るさを高く、夜間は低く設定します。
③マルチスクリーン管理:HDプレーヤーはクラスタブロードキャストをサポートしており、複数の画面間でコンテンツを統一的に更新できます。
④画面のオン/オフのスケジュール設定:ディスプレイのプロパティで電源のオン/オフ時間を設定し、自動的に実行します。
6.よくある質問:
送信失敗:ネットワークとUSB接続を確認し、画面パラメータが一致していることを確認し、制御カードがオンラインであることを確認してください。
表示異常:スキャンモード、データおよびOEの極性、モジュール配線を確認してください。
コンテンツが更新されない場合:再送信してエクスポートするか、コントロールカードを再起動してください。
 日本語
日本語  English
  简体中文
简体中文  Português do Brasil
  Italiano
  Español
  Français
  Deutsch
  한국어
한국어